This week while I am on vacation some of my great blogging buddies will be taking over for me. They are an uber talented group of ladies whose creativity inspires me everyday. I would like you to meet Julie from Lilacs & Longhorns who is incredibly talented and I am in awe of her beautiful home.
Hi! My name is Julie and I blog at Lilacs & Longhorns where I blog about my passion for all things home.
I am so happy to be here at Shanna’s today! She does so many inspirational projects, that I’m super humbled and flattered to be here guest-posting on her blog.
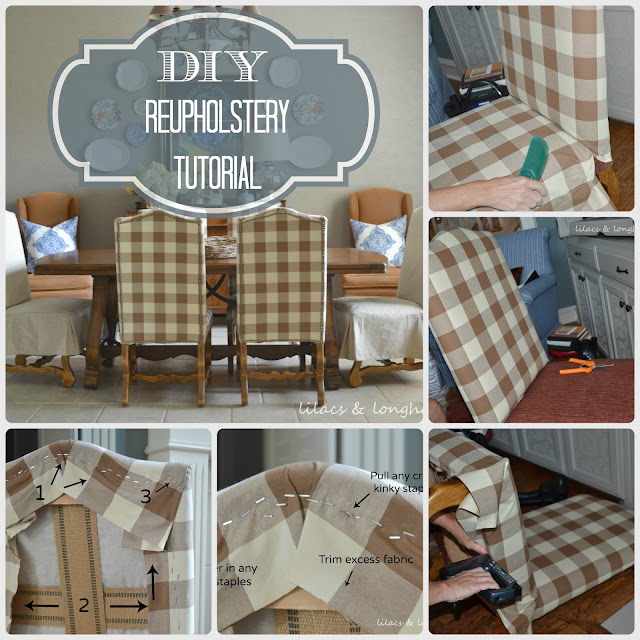
Today, I’m sharing one of my biggest and most gratifying projects to date: my upholstered dining room chairs.
You see, like most of us DIYers, I’m a cheapskate.
I don’t like to spend a lot of money because it leaves me more money to do even more projects!
That’s why I had to reupholster my dining room chairs myself.
Otherwise, my bargain Craig’s List upholstered dining chairs would not have been the steal I was bragging about.
They would have been…expensive.
Gasp!
I know. The horror.
I smashed my finger a time or two.
I said a few bad words and then apologized to my children.
I didn’t wear makeup or wash my hair for a few days. Yes, I smelled bad (hubby was traveling so I could get away with it and my kids are young enough not to care).
In the end, it was worth it.
I really am pleased with myself even if my eyes went a little kooky looking at all that buffalo check up close day after day.
If you’re a cheapskate too and you’re just aching to tackle a project like this, here’s how I did it:
DIY Reupholstery Tutorial:
Step 1:
Remove staples and any tacks.
I used three tools to remove my staples and tacks.
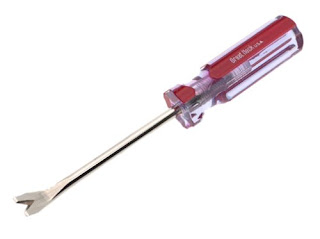
First, I used a tack remover like this one you can find at Amazon.com.
Then I used a combination of a flat head screwdriver and this amazing upholstery staple remover that I bought at a local upholstery supply store.
This part of the process was by far my least favorite part. Whoever originally upholstered these chairs used a million staples. The purchase of my staple remover tool made it so much easier and it was definitely worth the $15 investment!
Step 2:
Remove old fabric.
This sort of happens at the same time you remove the staples but sometimes it takes a some ripping and pulling! In my case, there were so many layers and so many staples I only removed the old stuff down to a single layer of fabric on the inside back and the seat of the chair. By this point, I had already removed several layers that included upholstery tacks, hundreds of staples, cording, cardboard pieces and the black fabric on the underside of the chair. Since I was doing several chairs I decided the old remaining layer was going to stay!
Step 3:
Cut new fabric.
Use old fabric as a cutting guide for new fabric. IMPORTANT: If you have patterned fabric you must allow extra yardage so the pattern will line up with other fabric pieces on the chair. For example, I first installed the front back of the chair seat (the part were your back rests) and was careful to install the fabric so a main line of the check was centered on the chair. Then, I installed the seat cushion, carefully matching the pattern to the chair back. I had to cut my pieces larger than the original fabric to accommodate for the pattern on the fabric.
Step 4:
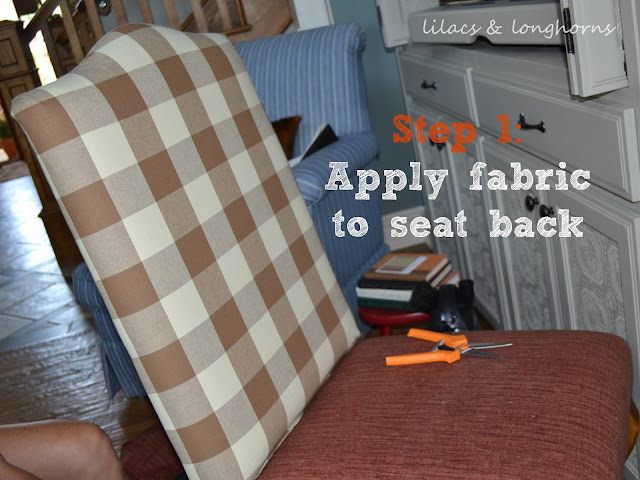
Apply new fabric to the chair.
I applied the fabric in this order:
1. The inside seat back (the part where your back rests)
2. The seat cushion
3. The back of the back rest (the part you see from the back)
It’s important how you staple the fabric on. (In my case, I needed to keep the checks straight and make sure they weren’t going on at an angle.)
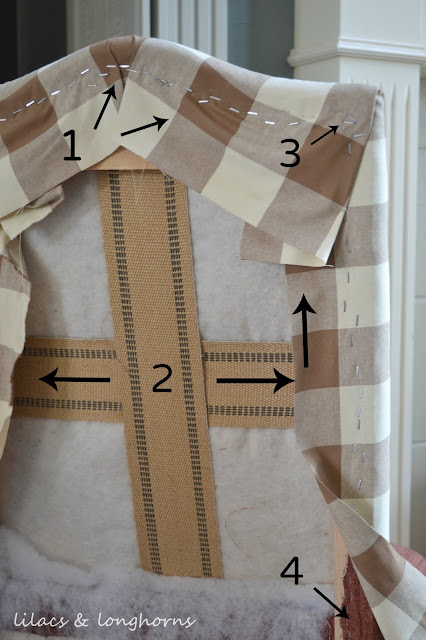
Carefully staple the fabric on to the seat back beginning at the top with a single staple in the middle, then pulling and smoothing and stapling the middle sides. Follow this same process for both the inside seat back and the seat cushion.
I’ve numbered the pictures below so you can see in what order I did my stapling:
After you have filled in and have a whole bunch of staples, inspect your work! Then, trim off any excess fabric. I trimmed mine so there was about an inch or so beyond the staples.
Step 5:
Apply fabric to the chair back.
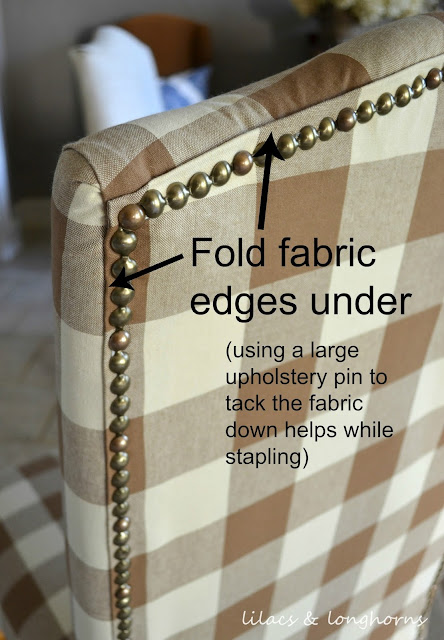
(My little photography helper wasn’t around when I did this part so my photos show after the chair was complete.)
This part is installed a little differently than the rest of the chair because you must fold under the edges to give it a nice crisp edge.
You could also use cording here, but I didn’t want to add to the cost and I thought it looked nice without it.
You must also carefully place your staples in a line so that the upholstery tacks will cover them up when you’re finished.
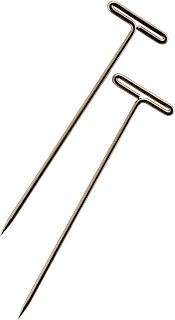
This part is not difficult, it just takes a little patience. Using T- pins (what I called upholstery pins in the photo) really help keep the fabric in place when you first get started.
Step 6:
Install the finishing touches — upholstery tacks.
I was able to re-use the strands of upholstery tacks that were previously on the chair saving myself a bundle. I did, however, have to buy new individual tacks to re-install them. It was easy peasy. Just put the new tack through the hole and hammer with either a small hammer or a special upholstery tack hammer. I used a small hammer I already owned.
Finished!
I’m not going to lie…doing four chairs was a lot of work, but I’m so happy I did it myself. I easily saved at least $600 by DIYing it.
If you’re interested in trying this at home, check out my post where I give you tips for doing reupholstery yourself. Included in that post is a link to a fabric yardage guide so you’ll know how much fabric your project might require.
Thanks, Shanna for having me here today!
I hope you all will stop on by my blog and pay me a visit!
Happy DIYing!








Leave a Reply