Happy Monday! I hope you guys had a great weekend!
Topher and I celebrated our 16th wedding anniversary in Kansas City. Sixteen years and we haven’t killed each other yet! Lots of fun vintage shopping where we saw some beautiful (and some bizarre) things. To see some of the fun pics of our weekend check out my new account over at Instagram.
Next Saturday, I’m hosting a couples baby shower for my brother and sister-in-law, and I’m in panic mode. The house is nowhere clean enough, the decorations aren’t ready yet, not sure about all of the food, and I have no idea what I’m going to wear. So for the next five days, I’m doing a step by step series on how to host a baby shower (since I have no available time to work on furniture).
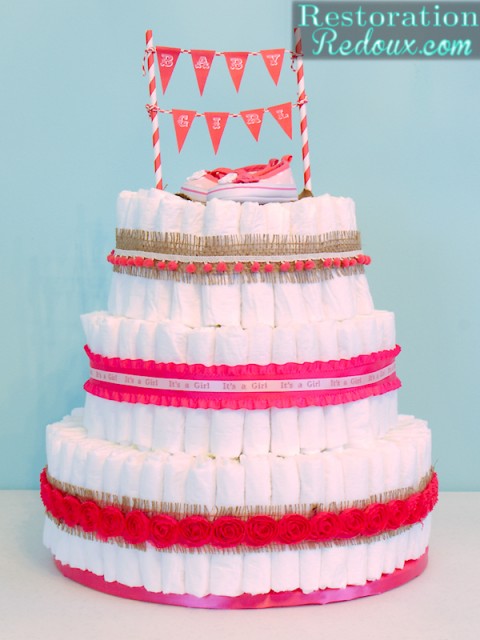
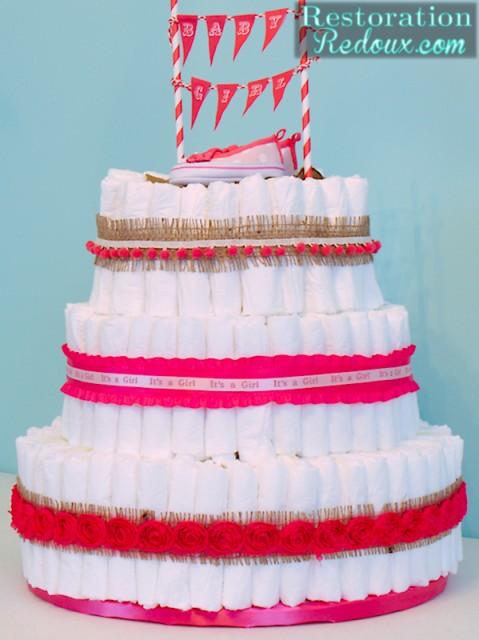
Let’s start with the center piece. The Diaper Cake.
This is what you will need:
- some twine
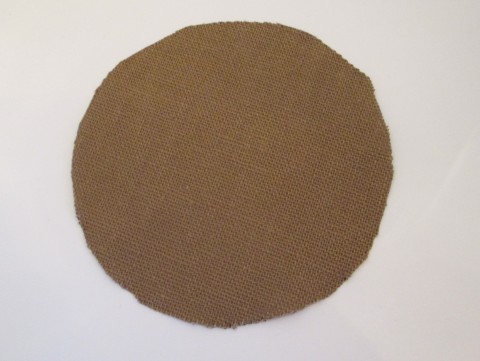
- a package of cardboard cake circles (I got mine at Michaels a package of 5)
- a 108 pack and a 40 pack of size 1 diapers
- a glue gun with glue sticks
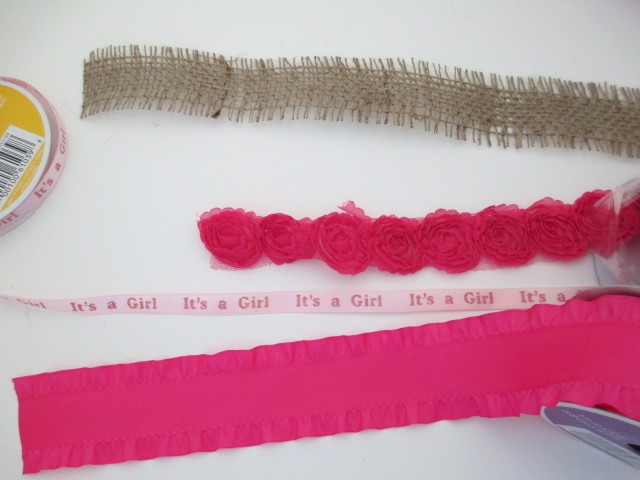
- different rolls of ribbon
- and some type of topper
Let’s get strarted:
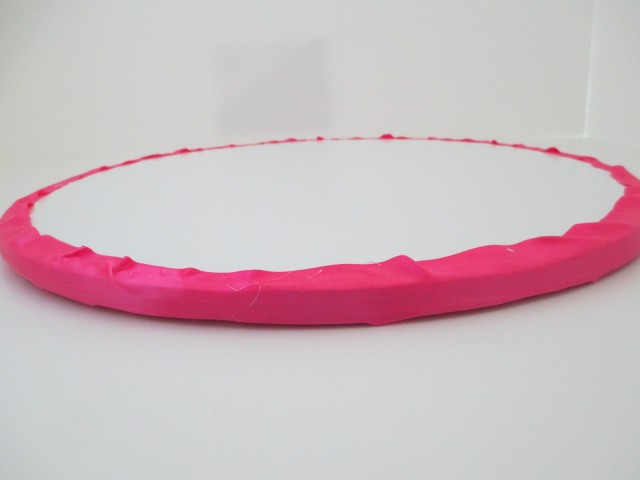
First hot glue three of your cake circles together.
Then hot glue some ribbon around the outside of the circles.
Next measure out your twine the same diameter of the your cake circles and tie a knot. Start folding your diapers in half (I folded mine with the diaper pattern facing the inside), and insert the diapers inside the twine. This is easier when you have one person holding to the twine tight, and the other person placing the diapers in the right spots until it is full enough to stand alone.
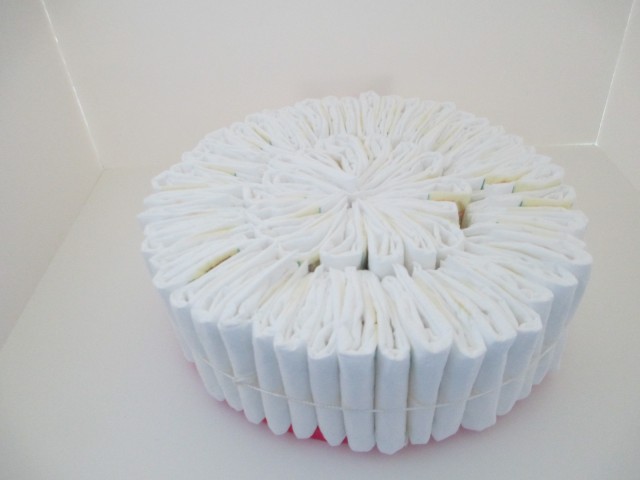
Once you get the entire perimeter filled, fill in the center with more diapers. Next start on the second layer doing exactly the same as the first except making the twine circle smaller.
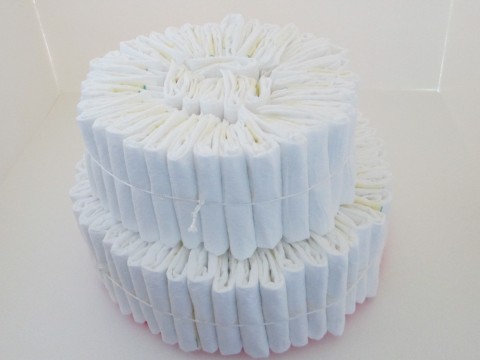
Repeat on the third layer.
After all three layers are finished, hot glue your ribbon on over your twine. I used a narrow ribbon over a wider one.
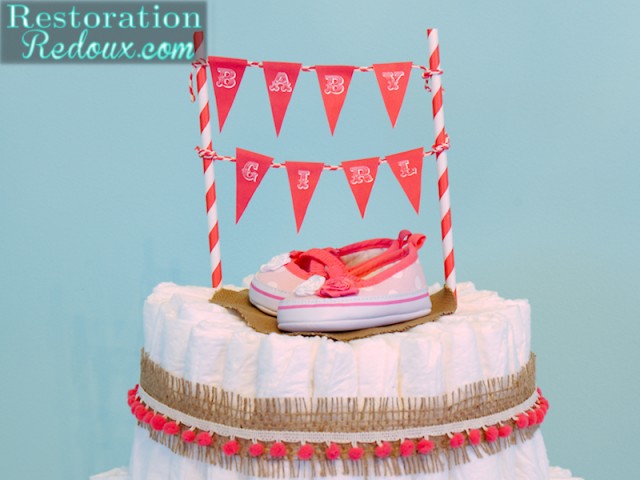
Once your ribbon is applied, start on your topper.
For mine, I cut a circle of material, but you could also use scrap book paper and hot glue it onto the top.
I then topped the cake with a pair of baby shoes.
I still needed a bit of height at the top, so I decided to make a bunting. I used two striped straws and placed them on either side of the material circle.
Next I took two pieces of string and tied them to the straws. I then found a link for a bunting template and printed it off.
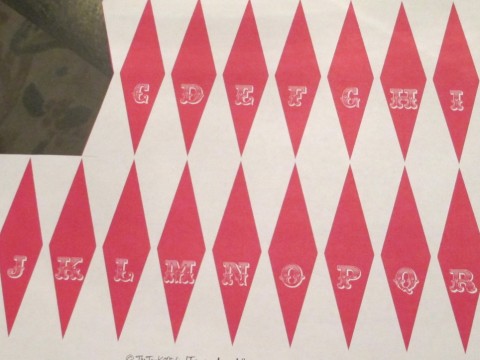
I cut the right letters out, covered the back with glue, and folded it over the string.
I was really happy with how it turned out!
Diaper Cake After
That is Part one of How to Host a Baby Shower come back tomorrow for Part 2!
Also, I’d like give everyone a giant THANK YOU for participating in my first giveaway!! And congratulations to our winner:
Darling Diaper Cake Shanna!!!
Thanks Joy!
Wow! What a sweet diaper cake! Love all the trims – pom poms always make me smile!! So cute the way you added the shoes and bunting at the top! Lucky mommy to have you to plan her shower! Cheers, Catherine (new follower)
Thank you so much Catherine! I’m so glad you are a new follower!
This turned out really cute!! Great tutorial, easy to follow, and a new mom can never have enough of those cloth diapers!! ~ Amy
How cute!!!! The diaper cake looks absolutely perfect, love how you did all the tiers! Very cute!
Thank you Maria!
This is an adorable diaper cake! Love that you don’t have to roll up a million diapers too 🙂
Thanks Jessie!
What a beautiful idea! So cute! I have a new weekly link party which is live now and I would love if you stop by and link up this wonderful post! Hope to see you there! http://mariaelenasdecor.blogspot.com/ Hugs, Maria
Diaper Cakes are the greatest baby shower gifts and party decorations, you can never have enough diapers. Thanks for coming by and partying with us at Fluster Buster’s Creative Muster.
Robin @ Fluster Buster
This project turned out beautifully! Thanks for sharing this tutorial-I’ll have to use this one for the next baby shower!
I just found out that I am going to be a great aunt~ ooh! that sounds so old! I am in charge of shower decorations, perfect timing! I am pinning! Thanks so much! 🙂
an easy to follow introductory diaper cake tutorial with all the details in place, nice job Shanna. Can’t wait for the rest of this diaper cake series.
I have seen a few of these diaper cakes – so creative – LOVE yours! I appreciate you sharing with A Return to Loveliness,
Kathy
Such a cute cake! Thank you for joining Home Sweet Home!
Sherry
Amazing cake Shanna. Thanks for linking up at Shabbilicious Friday.
Very cute diaper cake. Anyone would love to receive such a pretty cake. 🙂 I’m so glad you joined us at Transformed Tuesday.
Hugs,
Peggy~PJH Designs
This is so cute! I love the different trims on each layer. Thanks for sharing with Merry Monday!