Amy from Stow and Tell U was one of my first blogging buddies. We have both grown a lot since we started and I am always so impressed with her originality and creativity. Her post today is one of my favorites she has done, so make sure you head on over to her site and give her some love!
Hi my name is Amy, and I blog over at StowandTellU. I’m so excited to be here today while Shanna is soaking up the sites and sun on her cruise. Okay, I admit, I’m a little envious as the cold beats down on the Midwest. But honestly I’m hoping that Shanna and her family are having a fabulous time … and… I’m looking forward to her tall (and humorous) tales of adventure upon return.
I took a little trip myself last spring, to Kentucky (I know, it’s not nearly as exotic as a cruise). While there, I picked up a pair of black and white vintage, textured lamps that I just fell head-over-heels for.
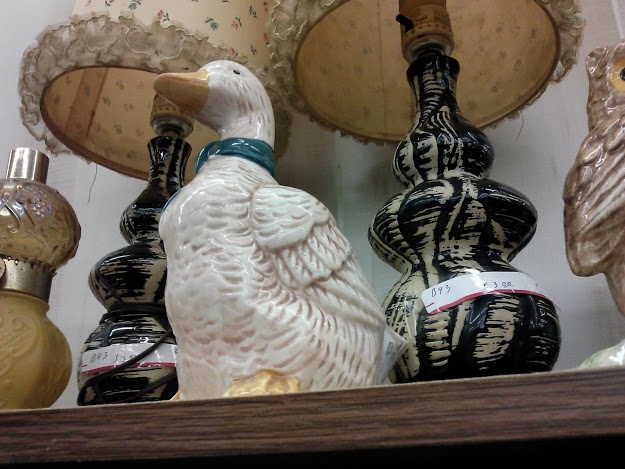 I liked them so much, that I actually took a picture of them while still on the shelf (next to the duck) at the antique store .
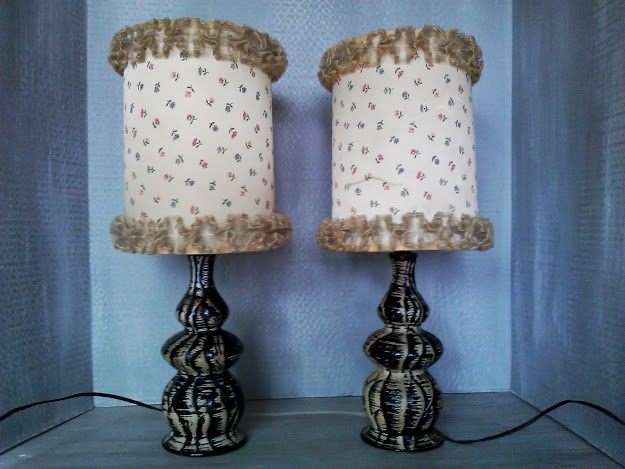 Needless to say, the lamp shades were very, very different… from the lamps they were on anyway. But they matched in proportion so well, that I decided to do my best to salvage and re-vamp these “very different” looking lamp shades, and Shanna actually helped!
 By way of her Ruffled Lamp Shade Tutorial, that is because I followed her directions to re-vamp these lamp shades with ruffled trim.
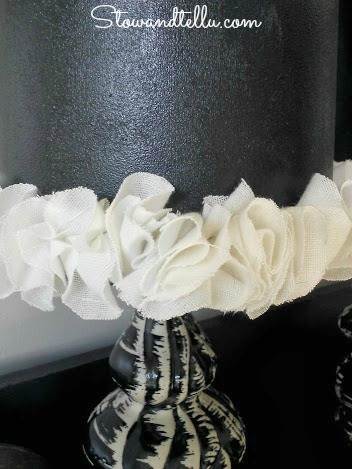
Of course, first I had to remove the original ruffles, repair the shades with glue and then paint them black.
From there I followed Shanna’s tutorial with only a few changes.
 I used a salvaged, white, large curtain panel that I picked up from the thrift store.
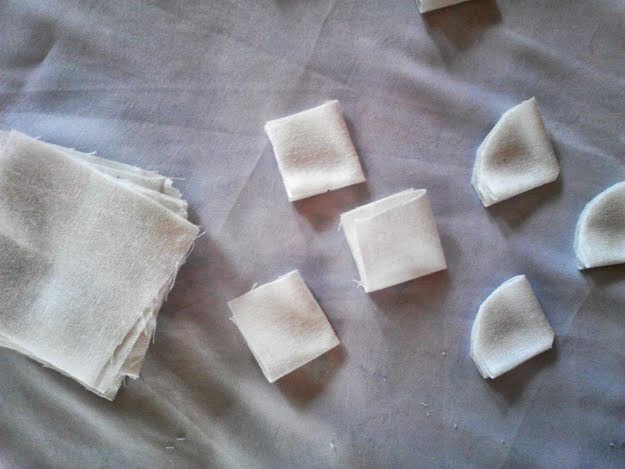 I cut a bunch of squares, folded the squares and cut around the corner to make circles. I also trimmed off just the tip of the point that would be the circle center when unfolded.
 I scrunched the circle from the center and hot glued the circle to the shade on a slight angle, then reversed the angle for the next circle, and so on.
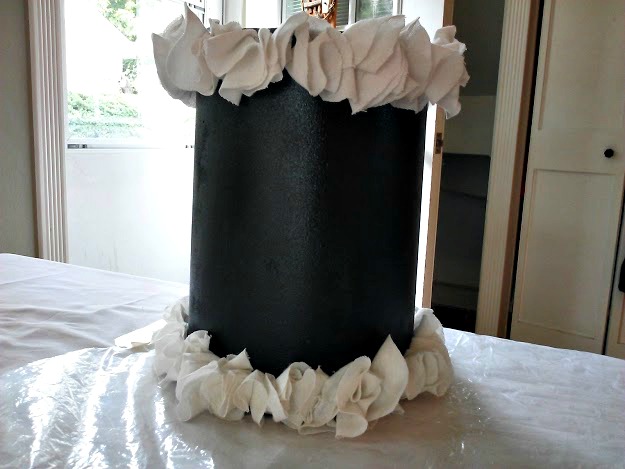 When I was done, the trim appeared too large at first, so I dabbed a bit more hot glue in the center of each circle and scrunched it down some more until it was size proportionate to the shade and lamp.
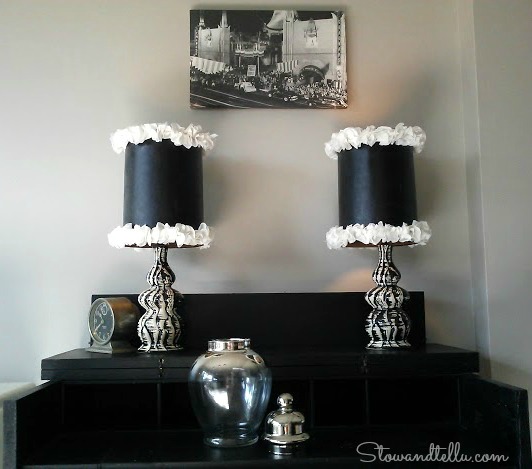

 Much better now, wouldn’t you agree? I simply love that vintage ceramic texture that comes from somewhere back around 1940 or so (just guessin’).
Were those the originals shades? I don’t know, but whether blue and pink or black and white, I thought the ruffled-trim look had to stay.
Thank you so much for following along. Feel free to stop on by StowandTellU any time or check out my other lamp shade projects.
Thank you, Shanna for having me over today. I hope you are having a safe and delightful trip!
– Amy
Your lamps look a trizillion times better with the shade makeover, Amy!
You turned somethihng that was “downright ugly” into something beautiful. Great job!